If you’re in manufacturing or machining, you’re likely familiar with burrs. Burrs are protrusions of material, such as metal, resin or polymer, generated from the processes of creating a part.
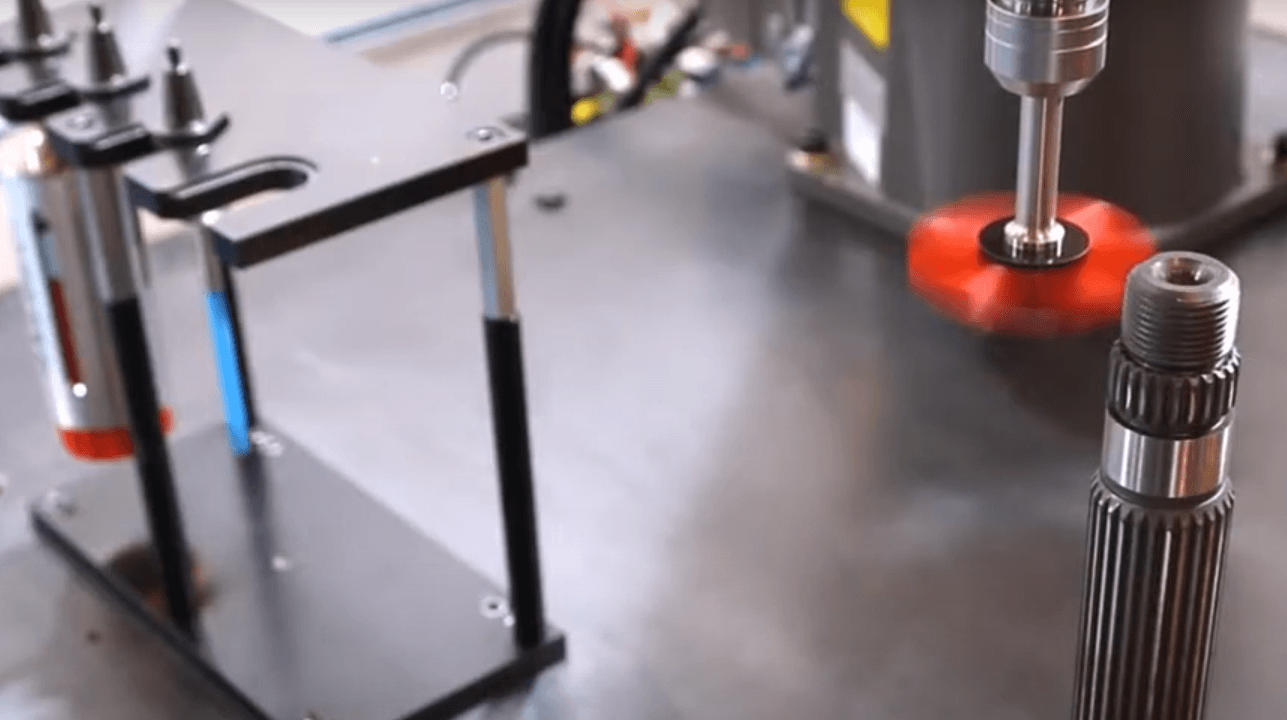
Specifications for a part may indicate “remove all burrs.” In these instances, burrs must be removed to avoid issues down the line. For this phase of the process, you’ll use deburring and finishing tools after processing, such as Xebec ceramic fiber brushes.
It seems like a simple progression from one phase of manufacturing to another. But many manufacturers and machine shops miss the opportunity to improve an overall run and get more out of their tools by controlling and optimizing burr formation.
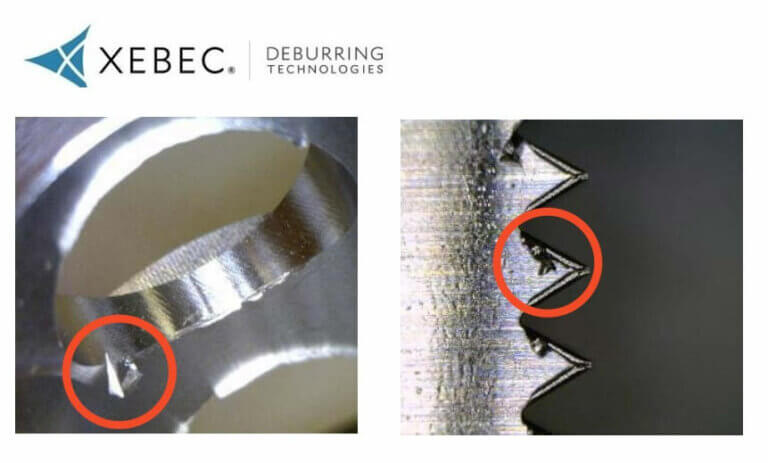
It’s impossible to avoid burrs altogether in most machining processes, but you can design the machining process such that burrs turn out smaller and more manageable. Smaller burrs can make later processes, such as deburring and finishing, faster and more efficient. Reducing burr size can also help you extend the life and efficiency of your deburring and finishing tools. Realizing these benefits helps manufacturers tackle other industry challenges.
Burr Basics to Understand and Control Formation
Understanding precisely how burrs are formed in your specific processes will help you identify the best ways to limit burr size and control direction.
How are burrs formed?
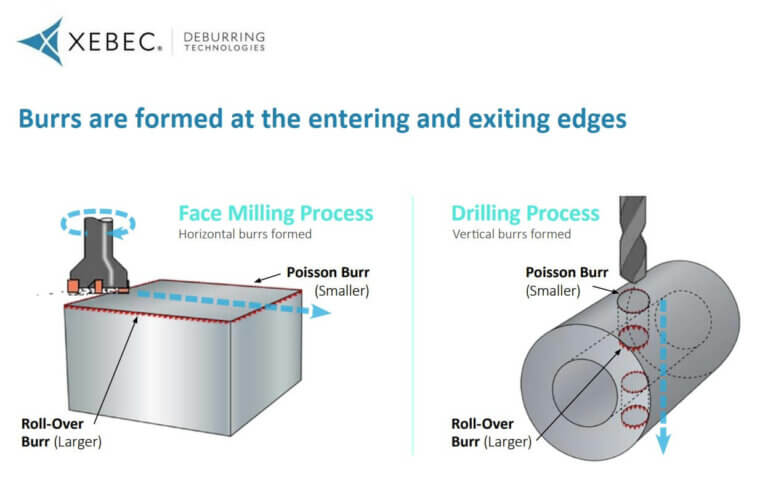
Burrs are formed at the entering and exiting angles of a tool on the part during processes such as face milling and drilling. The size of the burr and its direction will depend on the process.
During face milling, horizontal burrs are formed. At the entrance side, these horizontal burrs are small and are known as Poisson burrs. At the exit side, these horizontal burrs are large and known as Roll-over burrs.
During drilling, vertical burrs are formed. At the entrance side, these vertical burrs are small Poisson burrs. At the exit side, the vertical burrs are large Roll-over burrs.
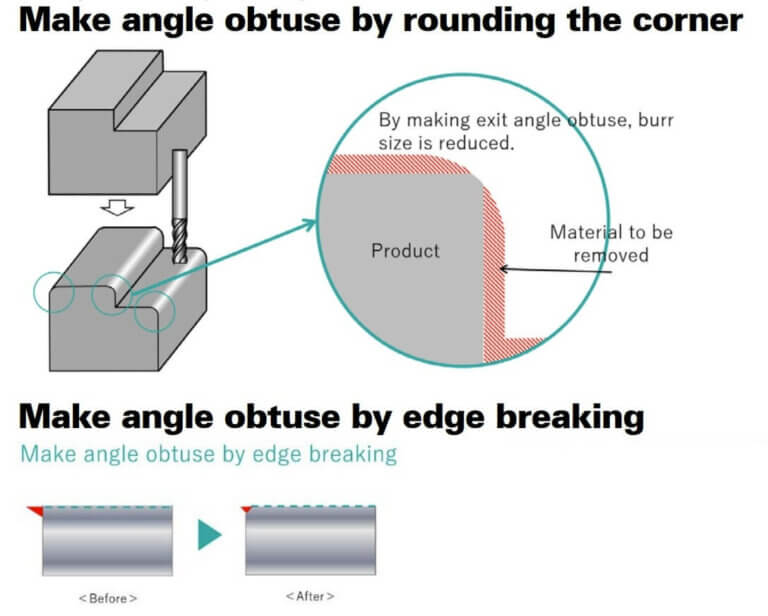
Burr size will also depend on the angle of the edge. The more obtuse an edge, the smaller the burr.
Keep in mind that different materials behave differently during processing. This means your burrs may behave differently. For instance, stainless steel produces “gummy” burrs, versus titanium, which is a hard material that is very machinable.
How are burrs measured?
In most cases, burr size is expressed by burr height, burr root thickness and burr length.
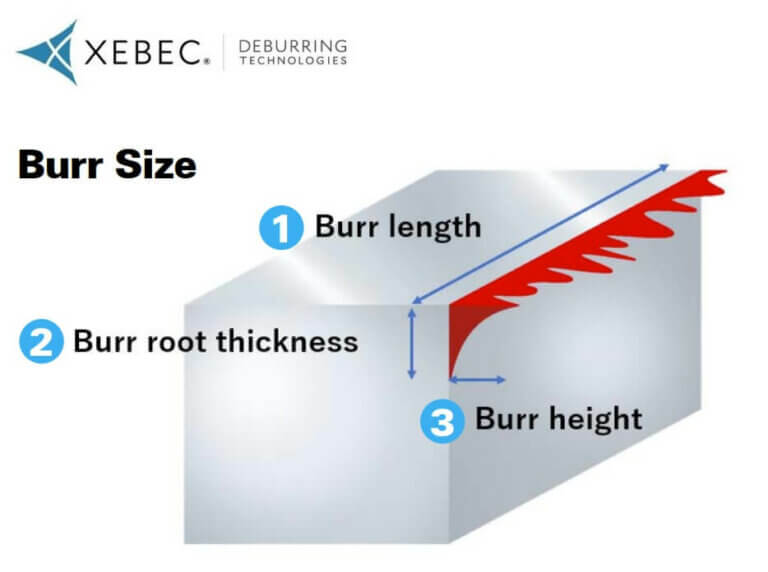
Manufacturers implement a variety of tools for measurement, including magnifying glasses, calipers and micrometers, microscopes and digital microscopes. Some shops use the “fingernail test” as keeping burrs smaller than the width of a fingernail renders them manageable and easier to remove. Burrs can also be measured with a surface roughness tester if the burrs are small enough and the distance short enough.
Measuring burrs is critical to meeting spec when instructed to “remove all burrs.” However, different manufacturers have their own standards for what measurement meets this requirement and how they inspect the result.
For some manufacturers, .05mm to 0.1 mm is an acceptable burr size for “remove all burrs.” For others, it must be smaller than .01mm. And many inspect simply by touch or sight, while manufacturers in exacting industries, such as medical and aerospace, take the time to conduct further measurements.
Why are burrs removed?
Burrs cause problems both in the shop and down the line. Depending on the part being created, burrs can be consequential to:
- Part Function – Detached burrs can cause sliding parts to jam and can clog oil holes and prevent lubrication. Burrs can also cause short circuits in electrical components, reduce fatigue strength by concentration of stress, and cause edge cracking.
- Appearance – Burrs can damage the appearance of a part and scratch other products.
- Assembly – Burrs can cause difficulties in assembly and affect measurement. They can also cause a parts feeder to malfunction or parts that must seal tightly to fail.
- Processing – Burrs can lead to positional errors in processing. They can also shorten tool life and dull edges.
- Safety – Burrs can cause injuries to operators. And removing them manually can lead to worker fatigue. Burrs can also be consequential to the health of the end user, as in the medical device industry.

Why minimize burrs
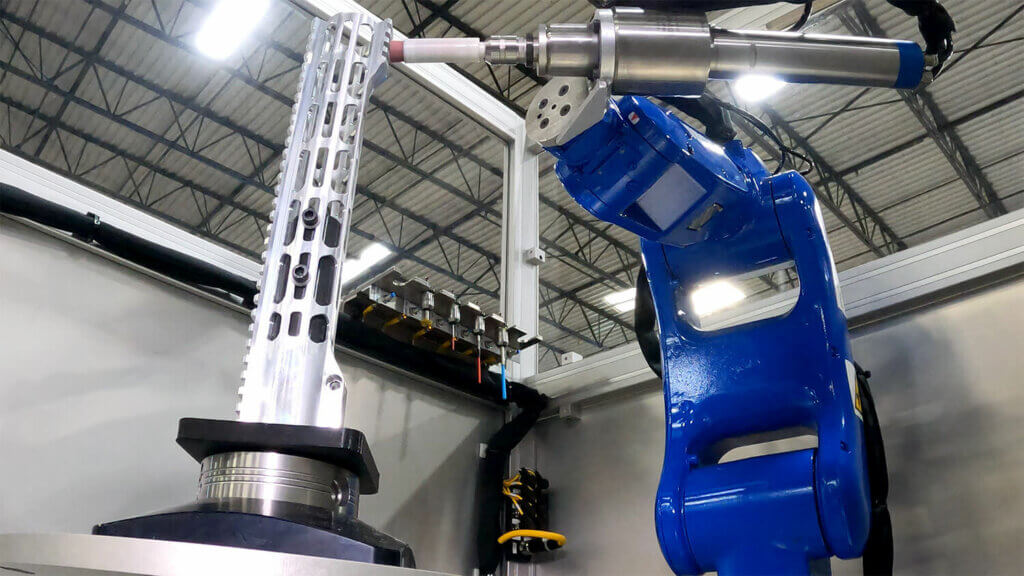
Minimizing burrs before the deburring and finishing process means you’ll have more options in terms of which deburring and finishing tools you can use. A burr smaller than 0.1mm is easier to remove and can be worked by most deburring tools, such as Xebec ceramic fiber brushes automated in a CNC machine or robot. The bigger the burrs are, the fewer tool options you’ll have.
When you optimize burr size and direction, it also makes your deburring and finishing processes faster and more efficient – affecting overall run time. Additionally, it will help you better maintain your deburring tools and extend their lives.
Pro Tips to Control Burr Size and Direction
We’ve identified six potential alterations for manufacturers to consider to better control burr formation in processing and improve production.
1. Replace worn tools
Regular maintenance of your cutting tools will reduce burr formation. Sharp tools with less wear and a clean cutting edge will produce fewer and smaller burrs during processing. Worn, dull tools will produce larger burrs. Make sure to replace old and worn cutting tools and create a regular schedule for tool maintenance.
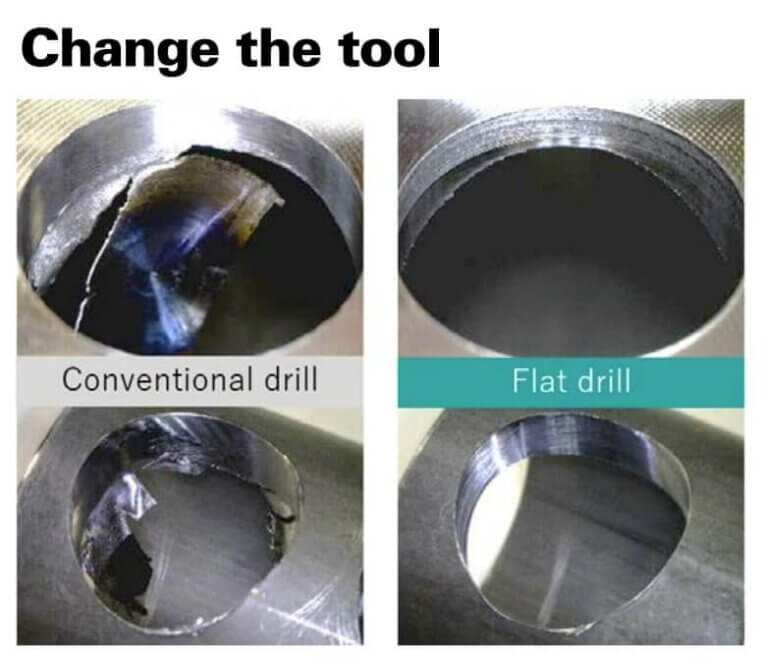
2. Change the tool
The style of a tool can affect the generation of burrs depending on the material you’re working on. For example, a flat drill may form smaller burrs than a conventional drill.
3. Change the angle
Altering the edge shape on a part can help you minimize burr formation. Acute-angled edges tend to turn out larger burrs, where obtuse-angled edges make it easier to control burrs. For example, you might try corner rounding, edge breaking or chamfering to reduce burr size. The way a part is fixtured is also important in achieving the right angle for successful deburring. In some cases, having a part completely perpendicular or parallel to the cutting surface is absolutely critical. If a machinist rips a part quickly to save cycle time yet the part is not completely perpendicular, they may not obtain enough cutting edges, potentially leaving a larger deburring burden than necessary.
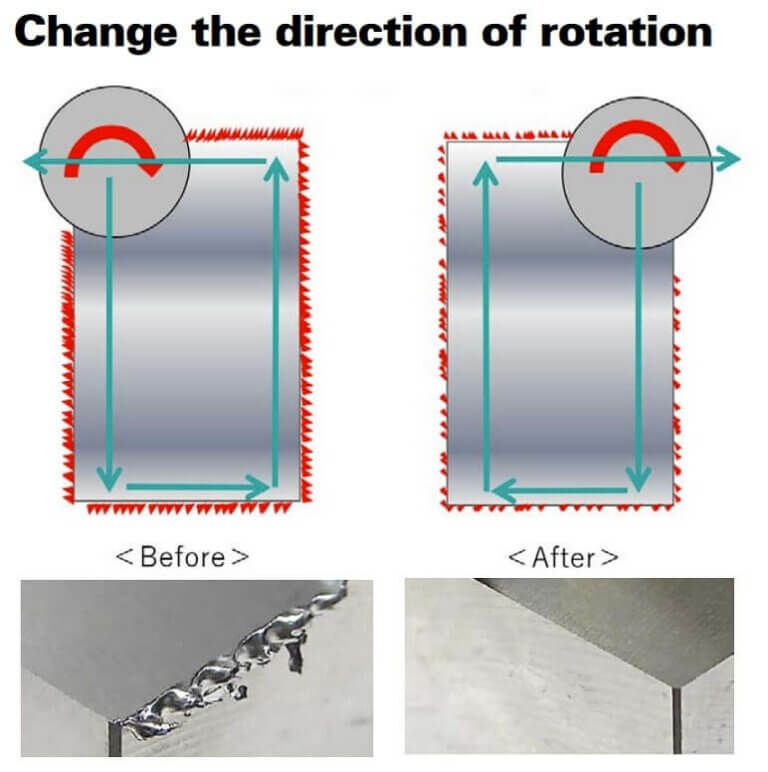
4. Change the rotational direction
Changing the rotational direction can make a big impact on minimizing burr formation. Consider the optimum direction prior to machining your part. For instance, if you face mill in a counterclockwise direction, burrs tend to be larger because they form on the exit side. If you change the tool path to a clockwise direction, the resultant burrs will be smaller.
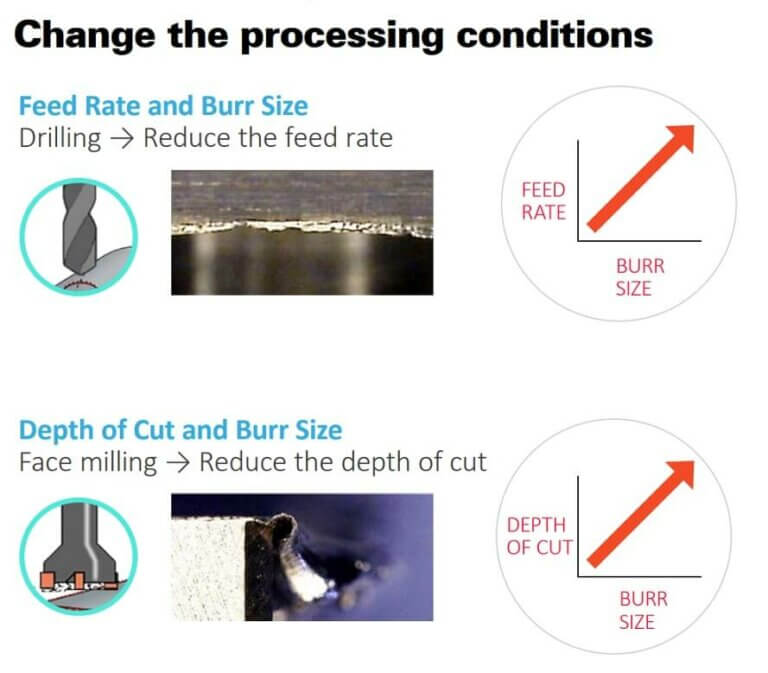
5. Change the feed rate or depth of cut
You can also control burr size by adjusting processing conditions, such as the feed rate and depth of cut. Typically, increasing the feed rate increases the burr size. Using a reduced feed rate when drilling reduces the burr size, creating secondary burrs that are easier to remove. Reducing the depth of cut when milling reduces burr size, as a greater depth of cut creates larger burrs. Finding the right balance will reduce overall production time.
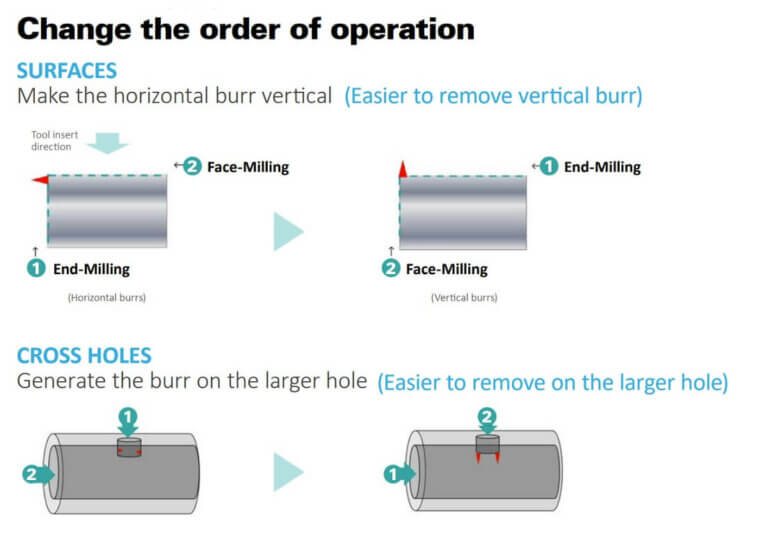
6. Change the order of operation
It’s easier to remove vertical burrs. Adjust the orientation of the burr by end-milling first and face milling second. Similarly, with cross holes, generate the burr on the larger hole as it will be easier to remove the burrs inside the large hole.
While shortening cycle time may seem to be the most important priority, focusing on the overall production time including the deburring process is critical for today’s manufacturers looking to cut costs and increase efficiency. This means looking at the deburring process with a critical eye and engineering processes that minimize the time accomplishing this step in production. Using automated deburring solutions from Xebec can reduce your overall production time and increase quality at the same time.


