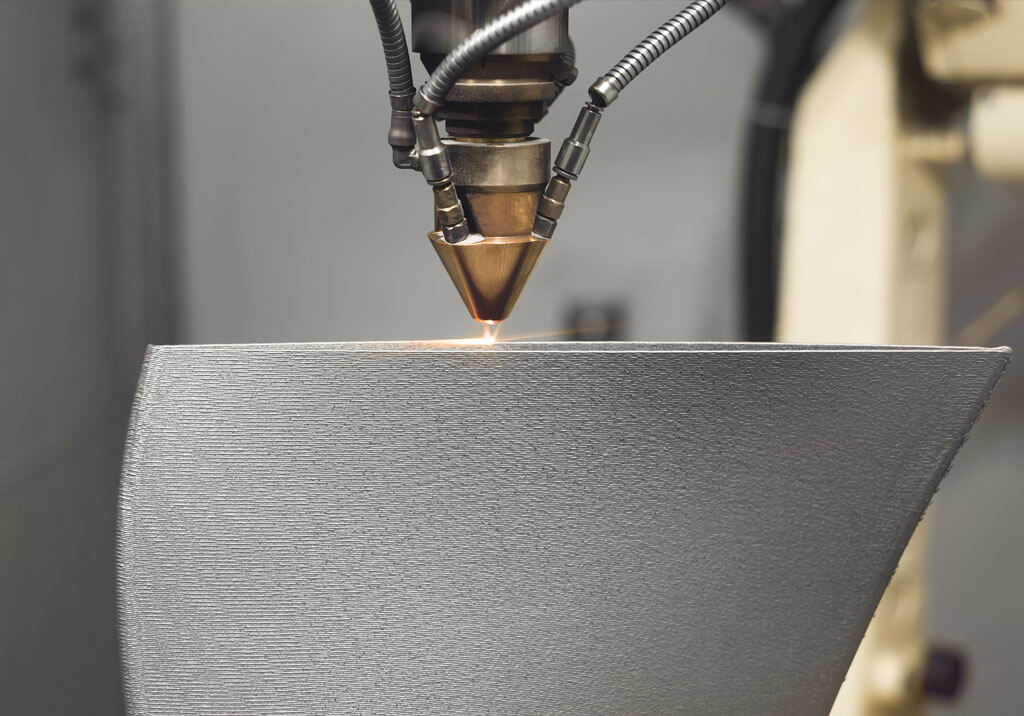
Surface finishing is an important part of the manufacturing process. It involves removing or reshaping the material to achieve a specific surface roughness that ensures post-production performance and endurance. It is often the last step before a part is ready for visual and quality inspections. For parts and components that require a “mirror” finish, which is typically considered 1-12 Ra microinches (µin), this step comes before a finer polishing process, such as polishing medical industry parts by hand with diamond paste.
Automating surface finishing processes has many benefits for manufacturers. For one, automation saves time and money compared to manual processes. And advanced tools, such as Xebec ceramic fiber brushes, can often help manufacturers meet and exceed Ra requirements, improving surface finish whether you’re polishing afterwards or not.
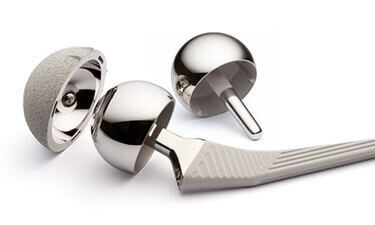
When you use a Xebec tool, additional polishing may be necessary to meet anything below 4 Ra microinches (µin). However, automated surface finishing with sophisticated tools gets manufacturers closer to spec faster and reduces the time for polishing work.
Xebec products, such as the surface brush, crosshole brush and back burr cutter, perform surface finishing quickly and efficiently with impressive, quality results. Our tools can typically achieve 4-40 Ra microinches (µin) depending on the material and the number of passes. In fact, Xebec tools often optimize production processes and improve cycle time by performing both deburring and finishing at once. In one example, a Xebec brush shortened polishing time from 60 minutes to 1.5 minutes.
Here, we’ll explain why surface finish is such a critical factor in production and outline the key basics of finishing and polishing.
Why is the surface finishing process important?
The primary goal of surface finishing is ensuring part performance. For instance, the right finish ensures a proper and secure seal between metal parts in many assembly applications.
But today, manufacturers are also prioritizing the “look” of the part – even if the appearance has no bearing on the final function of the component. Sometimes this is the preference of the manufacturer, but more often it is the demand of the customer or their end customer.
Producing parts that meet all requirements for quality, function and appearance is essential to meeting current demands. It also helps machine shops and manufacturers strengthen their reputations for quality production so they can retain business and pursue growth.
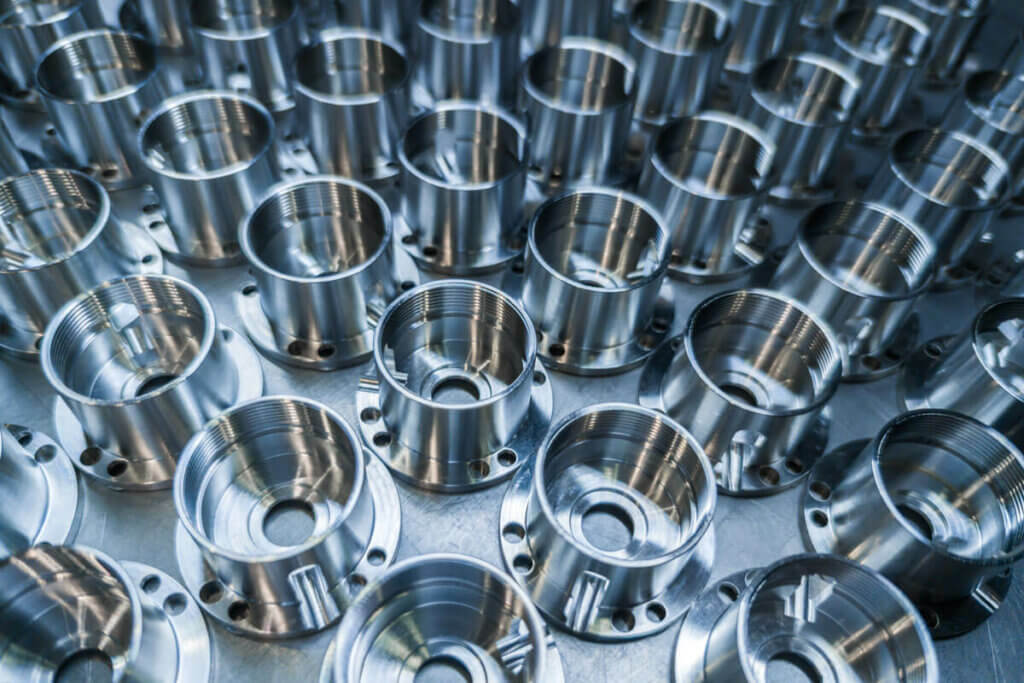
A quality, to-spec surface finish is also important:
- For sanitary purposes, as in the medical and food and beverage industries.
- To ensure protection from the elements, reducing the likelihood of rust and corrosion.
- For durability to ensure the final component continues to function for its expected life.
- To prepare a surface for post-production process, such as anodizing or heat treating.
For many shops, finishing is the last step before inspection. But with higher expectations for appearance, their current methods may come up as inadequate.
Adding more elbow grease and precision to current finishing methods isn’t the best solution to overcoming this manufacturing challenge. Instead, replacing manual methods or automated finishing with impregnated nylon brushes by incorporating a Xebec cutting tool into the process can lead to:
- Improved surface finish – both visually and technically.
- Consistent results that are to spec.
- Faster finishing process compared to both manual and automated alternatives.
- Consolidation of deburring and finishing, reducing wasted tools and time.
- Opportunities to reallocate labor to run more machines and perform other valuable tasks.
What is surface roughness?
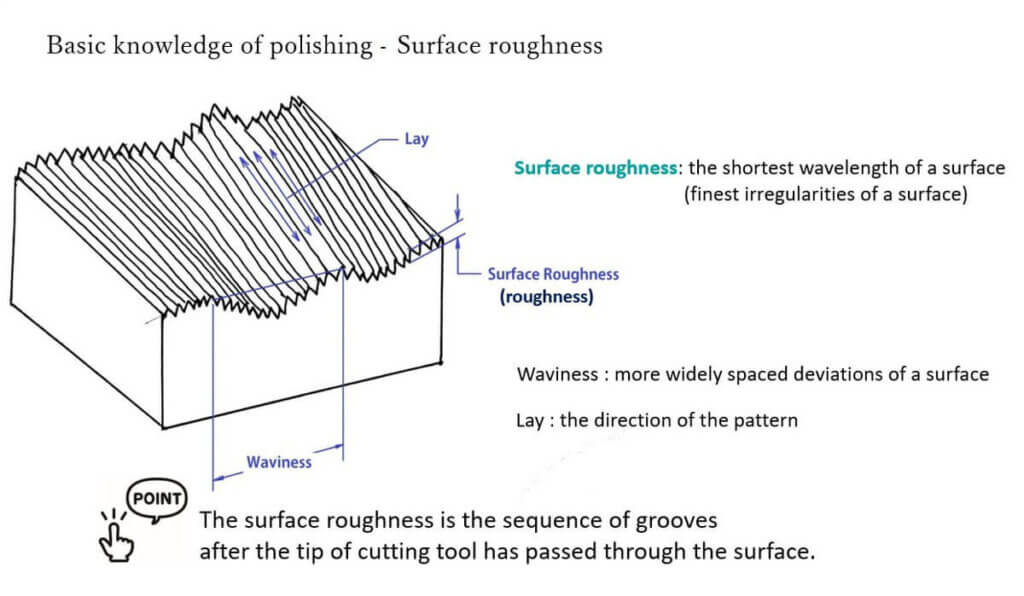
Surface roughness is often used interchangeably with surface finish. It is a calculation that reflects the condition of a machined surface. It involves measurements of the peaks and valleys, or irregularities, left behind from various steps in the manufacturing process. Surface roughness plays an integral role in ensuring proper performance and durability for the part or final product.
Measurements include the height of peaks, depths of valleys and spacing in between. Other key measurements include waviness, which is the distance between broader-spaced deviations, and lay, which reflects the most common direction of the irregularities.
An irregularity that isn’t part of the requirement could lead to issues such as loosening, leaking and friction. The material acquires irregularities throughout the production process, such as in the cutting phase or where a tool overlapped to create a step-over line. And different materials are susceptible to different types of irregularities. Surface finishing reduces irregularities in the surface to reach the specified requirement.
What are the units of surface roughness?
The two common units of surface roughness are Ra (Roughness Average) and Rz. Both are measurements related to height and are meant to reflect the smoothness of the surface. These measurements are typically made in U.S. microinches (µin) but can also be expressed in micrometers (µm) when using metric units.
Ra is the average height between peaks and valleys. Rz is the average difference amid the five most significant peaks and valleys.
Manufacturers use the machining surface finish chart, a set of internationally recognized guidelines for measuring standard surface finish parameters which manufacturers use to confirm they’re following the guidelines for measurement and ensure quality outcomes.
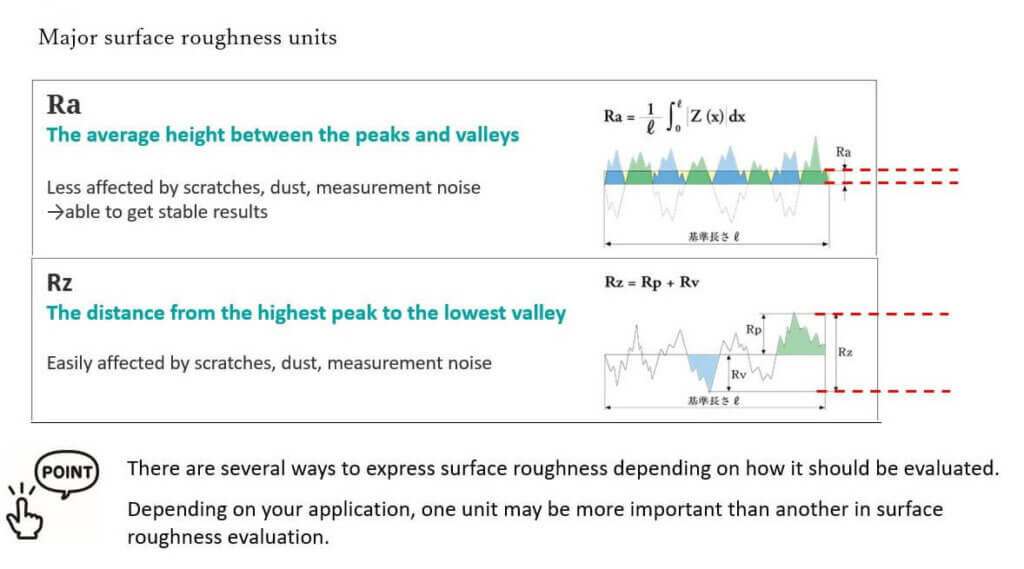
The Rmax is another roughness measurement which typically indicates a scratch or burr. It is the maximum roughness, representing the greatest distance from a peak to a valley.
Other measurements that contribute to getting an accurate surface roughness include:
- CLA: Center Line Average
- RMS: Root Mean Square
- Rt: Roughness Total
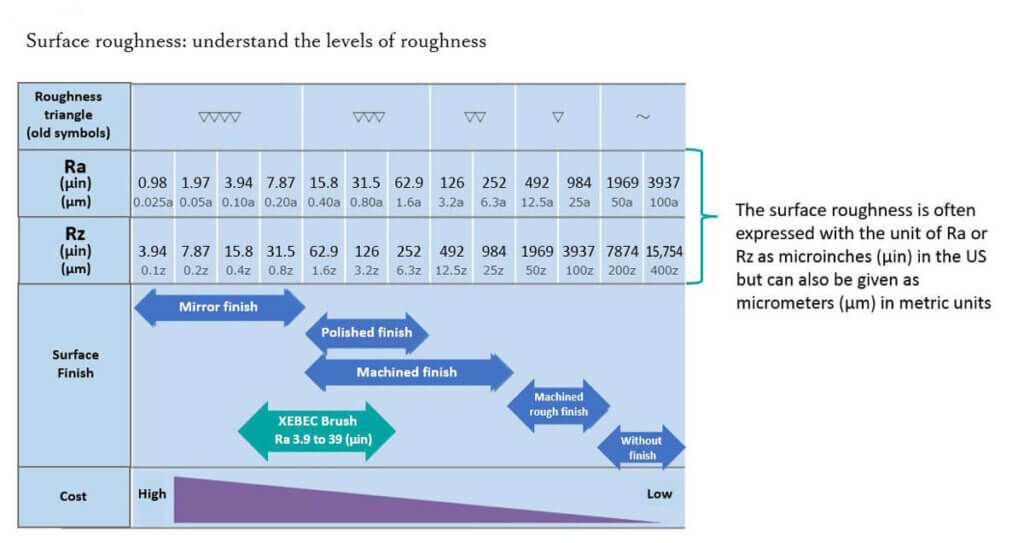
How to measure surface roughness
Elements of surface roughness are often visible to the naked eye, such as tool marks, scratches, burrs, the direction of the material and the “blurriness” or unfinished look of the surface.
Yet, to ensure the component operates as it should – for as long as it should – you must carefully measure the roughness with the appropriate instruments. Such instruments will allow you to measure the microscopic asperity, or roughness, of the surface so you can quantify it accurately. This will help you make the right calculations to get to the required Ra or Rz.
Measurement tools for surface roughness fall into two categories: contact and non-contact.
- Contact instruments involve touching a stylus to the material to measure its profile, such as with surface roughness testers and atomic force microscopes.
- Non-contact instruments rely on light to measure the profile of a material, such as with white light interferometers and laser scanning microscopes.
Many manufacturers use the International Organization of Standardization (ISO) standards for their measurements. This ensures that parts produced separately by different manufacturers are compliant with one another.
Using Xebec products for surface finishing
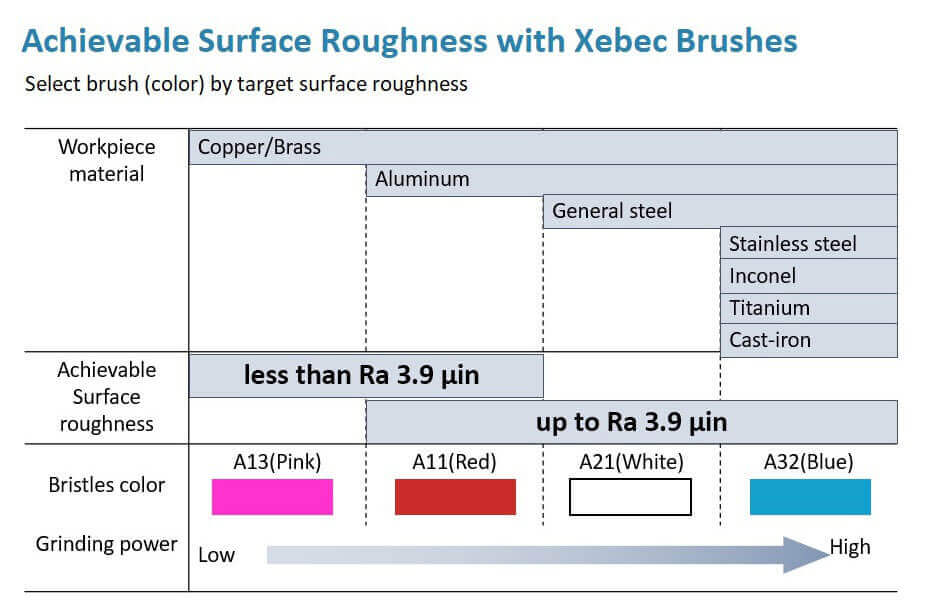
Xebec brushes deliver the consistency, accuracy, quality and speed of production manufacturers seek in their finishing operations. These brushes act like cutting tools, performing both deburring and finishing at the same time, meeting Ra requirements perfectly, and producing beautiful, improved finishes. They’re most efficient on 4-axis and 5-axis machining centers and can typically improve surface roughness up to 4 Ra (microinches µin).
Manufacturers use Xebec products for:
- Deburring
- Cutter and tool mark removal
- Removal of cusps
- Rough and medium finishing / polishing
Xebec products also produce impressive finishes that get parts in great shape for post-production processes such as anodizing, bluing, heat treating, powder coating and more.
Xebec brushes work best for pre-polishing and surface preparation or finishing and aren’t suitable for obtaining mirror finishes or for precision grinding. However, using Xebec products before polishing can improve surface roughness and reduce the level of polishing work required. In fact, initial processing can improve finish by approximately 1/2 per pass with Xebec Brush in a machine. This can save hours of hand work. Properly preparing the surface before the polishing process will keep production time to a
minimum and improve finish quality and consistency.
In fact, using Xebec tools to automate deburring and finishing has benefits beyond great results:
- Reduce strain from labor shortages by automating manual finishing.
- Streamline production and reduce wasted tools and time by consolidating steps. For example, if you’re using chamfering or carbide tools for deburring when it isn’t called for, the Xebec brush can replace that and remove that cycle time.
- Run jobs faster, as Xebec brushes are up to 6 times faster than nylon impregnated brushes and wire brushes.
These benefits often lead to substantial time and cost savings for manufacturers.
Use cases for Xebec surface finishing tools
Xebec tools have surface finishing applications in many industries, including:
For example, Xebec brushes accomplished improved quality and consistency with cutter mark removal from an aluminum vacuum device as well as mold polishing of NAK55 Steel.
Medical Device Finishing
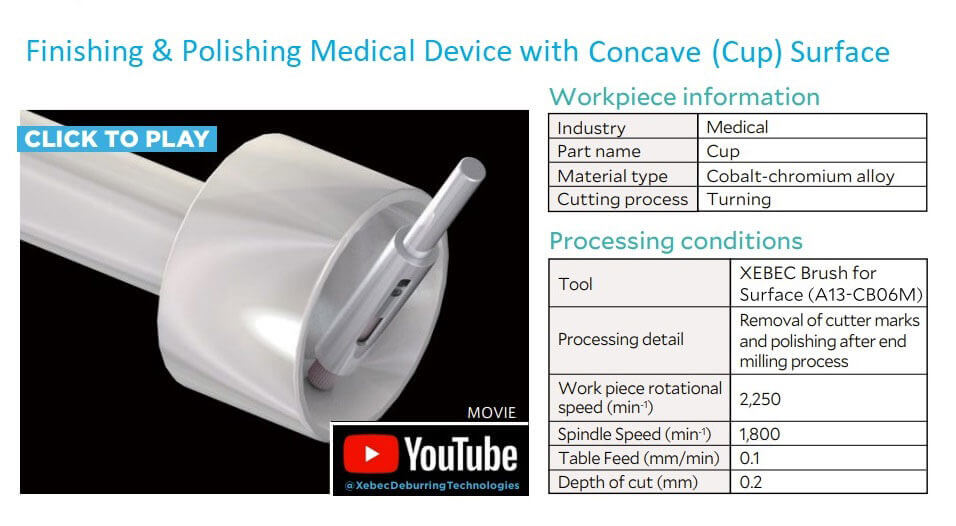
For parts that have convex and concave surfaces, Xebec brushes are ideal for deburring after face-milling, end-milling and drilling. Using an automated process with Xebec brushes also reduces the time needed to remove tool marks and polish the surfaces.
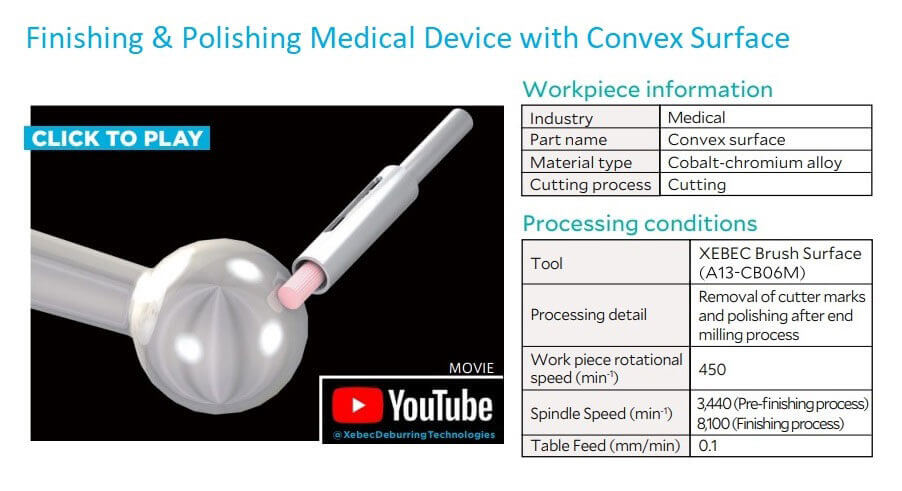
In both examples below, a Xebec Surface Brush (A13-CBO6M) was used for the automated removal of cutter marks and polishing after end milling process of cobalt-chromium alloy parts for the medical industry, replacing the manual use of grindstones and sandpaper. Using Xebec to deburr and polish these parts resulted in an automated deburring process with much stabler quality in a shorter cycle time.
Finishing and polishing a medical device with a convex surface:
Finishing and polishing a medical device with a concave (cup) surface
Mold Polishing
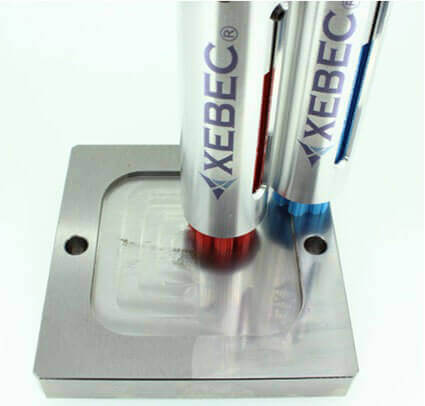
In a mold industry application, two Xebec Surface brushes were applied to efficiently polish a mold made of NAK55 Steel after end milling, replacing a lengthy manual process. By using the Xebec brush on the CNC to remove tool marks and cusps and conduct the rough and medium polishing, the company was able to free up labor for other tasks.
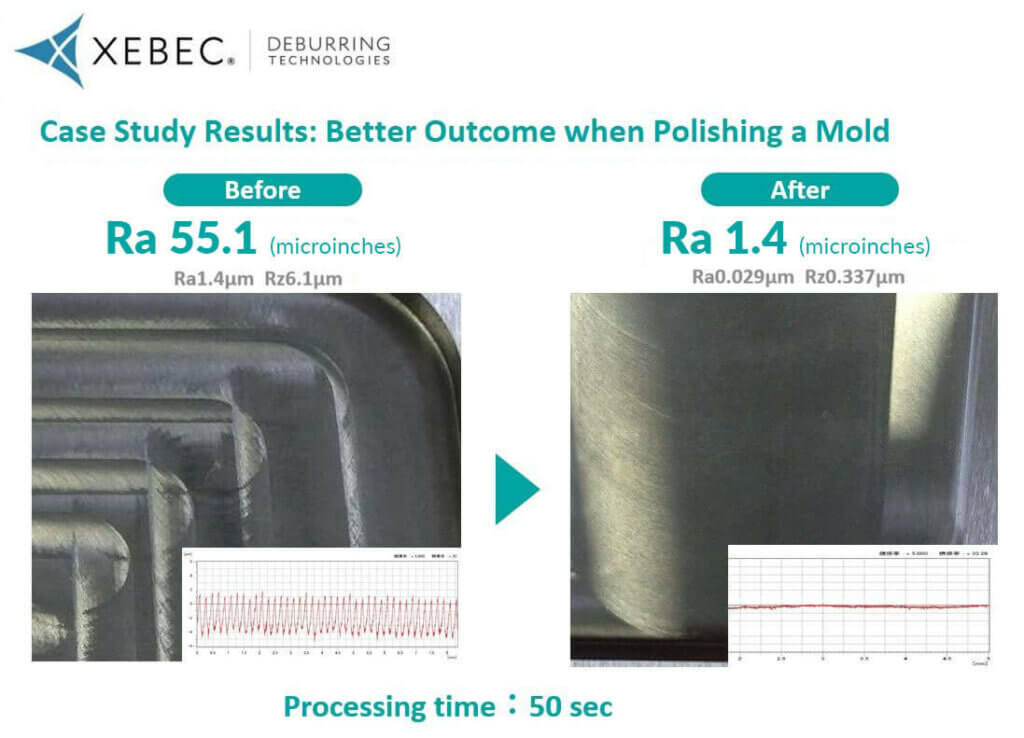
With a polishing process previously all done by hand, the time for the finishing stage was significantly reduced and each piece had a consistent quality finish. The Xebec brush achieved much better results in the same amount of time. The brush reduced the surface roughness from an Ra of 55.1 Ra microinches to an Ra of 1.142 microinches.
Conclusion
Understanding the basics of deburring, surface finishing and polishing will help you develop the best process for your application – and select the tools with the greatest return on investment. Finishing with Xebec tools gives you the reliability and consistency you need to get to the right Ra, faster and more efficiently. It can reduce labor costs, remove quality issues with manual deburring and solve some of your major production headaches. It can also reduce or eliminate the amount of post-machining polishing required. And it can produce the ideal surface finish for other post-machining processes, such as anodizing.
Contact us to see how Xebec brushes can help in your specific application.


